Container Executor
The Testkube Container Executor allows you to run your own container images for executing tests. Testkube orchestrates the Tests using the container image as Kubernetes Jobs.
The Test execution fails if the container exits with an error and succeeds when the container command successfully executes.
That's the new and recommended way of running custom images. Docs about the prebuilt custom executors can be found here.
Creating and Configuring the Container Executor: cURL
In the following example, the custom cURL executor will be creating using curlimages/curl:7.85.0 image. Testkube supports interacting with custom executors using any of available methods - Testkube Dashboard, CLI, and CRD.
- Dashboard
- CLI
- Custom Resource
Let's start with Dashboard first. You can view existing executors by going to the Executors tab.
![]()
Also in the Dashboard, you can create a new custom Container Executor. To do this, click the Create a new executor button.
The executor creation dialog will be displayed. That's where you can name you executor and set the image that will be used for execution. You also need to set Executor type - that's the name you will later use in your Tests as the test type. In this example we created a custom Curl executor:
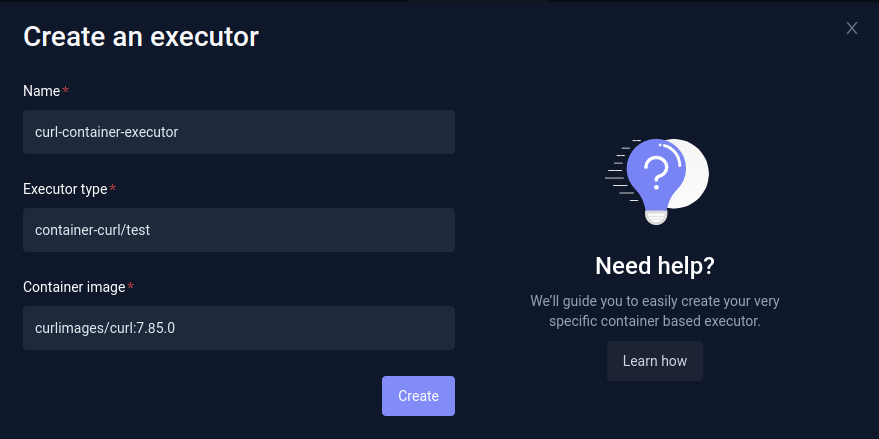
After the executor is created, you will be redirected to the executor settings view. That's where you can set additional settings.
Additional settings
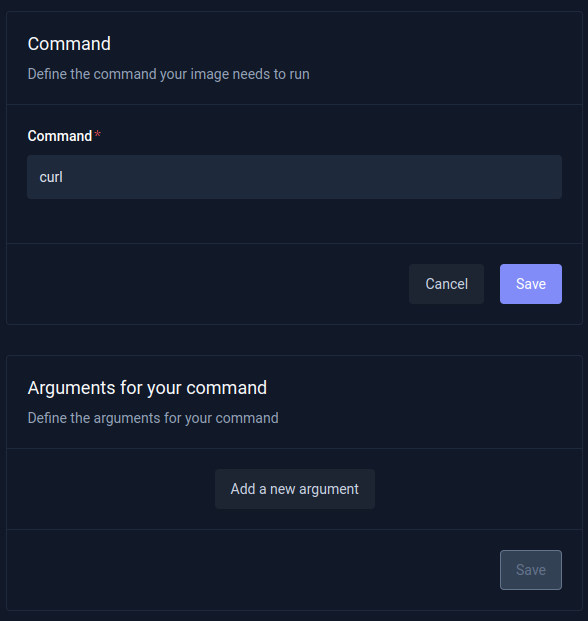
In the Command & Arguments tab you can define the Command your custom executor will run and default arguments. Let's set the Command to curl:
The Container Image tab allows you to change the container image which is used, or set Secret ref name if the image is in the private registry.
Additionally, the Definition tab allows you to check the Executor CRD:
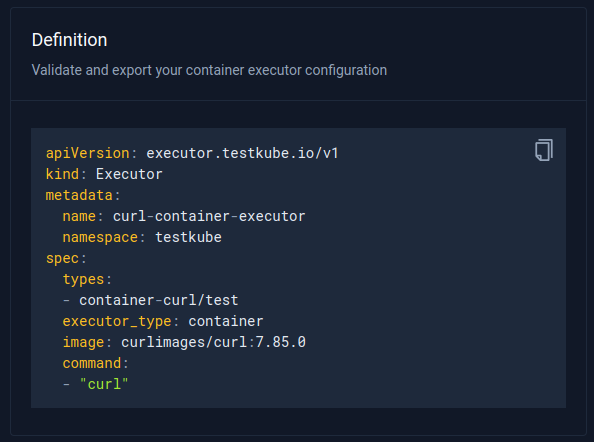
The container executor is created and configured and it can be used for running tests.
The Custom Container Executor can also be created with the Testkube CLI using the testkube create executor command:
Let's check available the configuration options first:
$ testkube create executor --help
Create new Executor Custom Resource

Usage:
  testkube create executor [flags]

Aliases:
  executor, exec, ex

Flags:
      --args stringArray                 args passed to image in executor
      --command stringArray              command passed to image in executor
      --content-type stringArray         list of supported content types for executor
      --docs-uri string                  URI to executor docs
      --executor-type string             executor type, container or job (defaults to job) (default "job")
      --feature stringArray              feature provided by executor
  -h, --help                             help for executor
      --icon-uri string                  URI to executor icon
      --image string                     image used for executor
      --image-pull-secrets stringArray   secret name used to pull the image in executor
  -j, --job-template string              if executor needs to be launched using custom job specification, then a path to template file should be provided
  -l, --label stringToString             label key value pair: --label key1=value1 (default [])
  -n, --name string                      unique executor name - mandatory
      --tooltip stringToString           tooltip key value pair: --tooltip key1=value1 (default [])
  -t, --types stringArray                test types handled by executor
  -u, --uri string                       if resource need to be loaded from URI

Global Flags:
  -a, --api-uri string     api uri, default value read from config if set (default "http://localhost:8088")
  -c, --client string      client used for connecting to Testkube API one of proxy|direct (default "proxy")
      --crd-only           generate only crd
      --namespace string   Kubernetes namespace, default value read from config if set (default "testkube")
      --verbose            show additional debug messages
--nameis mandatory - that's custom executor's name.--executor-typeneed to be set tocontainer--imageis the executor image (for example,curlimages/curl:7.85.0)--typesthat's the name you will later use in your Tests as the test type (for example,executor-curl/test)--command(for example,curl)
Which results in:
testkube create executor --name curl-container-executor --executor-type container --image curlimages/curl:7.85.0 --types curl-container/test --command curl
In order to use the Container Executor, create a new executor with executor_type: container and your custom type. For example:
apiVersion: executor.testkube.io/v1
kind: Executor
metadata:
  name: curl-container-executor
  namespace: testkube
spec:
  image: curlimages/curl:7.85.0
  command: ["curl"]
  executor_type: container
  imagePullSecrets:
    - name: secret-name
  types:
    - curl-container/test
In the above example, all Tests of curl-container/test will be executed by this Executor. Then you can create a new test that uses this Executor:
apiVersion: tests.testkube.io/v3
kind: Test
metadata:
  name: test-website
  namespace: testkube
spec:
  type: curl-container/test
  executionRequest:
    args:
      - https://testkube.kubeshop.io/
    variables:
      TESTKUBE_ENV:
        name: TESTKUBE_ENV
        value: example
Executing this test will run a Kubernetes Job with:
curlimages/curl:7.85.0imagesecret-nameimage pull secretcurlcommandhttps://testkube.kubeshop.io/argument
You can provide the image, args, command, and image pull secrets in the HTTP Request, Test Spec, and Executor spec. The container executor merges all the data using the following order:
- HTTP Request.
- Test.Spec.ExecutionRequest fields are used if they are not filled before.
- Executor.Spec fields are used if they are not filled before.
Creating and Configuring a Container Executor: Playwright
Despite having the dedicated Playwright executor, you may want to use a version that isn't supported. That's where you can use the Container executor. It allows you to use any Playwright image you may need.
The example Playwright project uses Playwright 1.31.1: https://github.com/kubeshop/testkube/tree/main/test/playwright/playwright-project
That is the specific version that is needed to run the tests. So, in this example the container executor will be created with mcr.microsoft.com/playwright:v1.31.1-focal Playwright official image. If you need another image you can find specific image tags in the Playwright Docs: https://playwright.dev/docs/docker#image-tags.
- Dashboard
- CLI
- Custom Resource
Again, let's start with the Dashboard first. In order to create a new custom Container Executor you need to go to the Executors tab and then click the Create a new executor button.
![]()
The executor creation dialog will be displayed. That's where you can name the executor and set the image that will be used for execution. That's where you also need to set Executor type, the name you will later use in your Tests as the test type. In this example we created a custom Playwright executor:
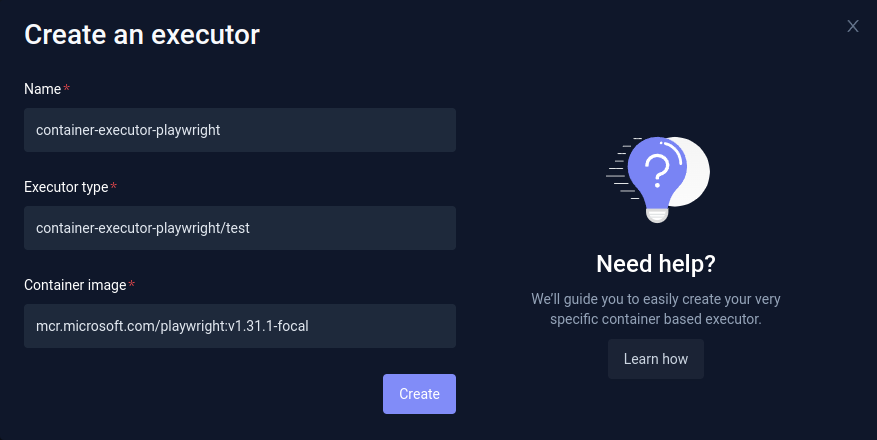
After the executor is created, you will be redirected to executor settings view. That's where you can set additional seetings.
In this case you will need to set the Command that will be executed.
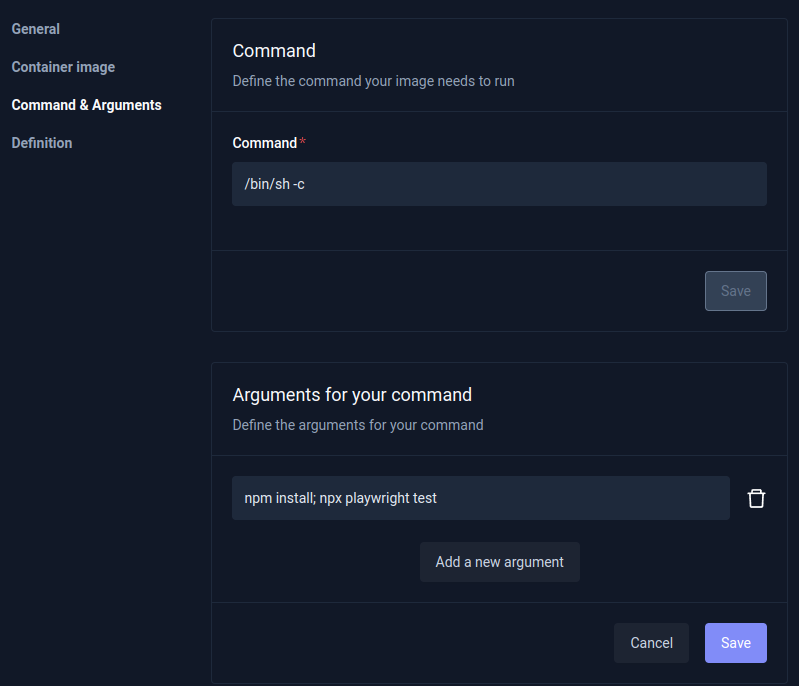
Command: /bin/sh -c
Arguments: npm install; npx playwright test
Custom Container Executor can also be created with Testkube CLI using testkube create executor command.
--nameis mandatory - that's custom executor's name.--executor-typeneed to be set tocontainer--imageis the executor image (mcr.microsoft.com/playwright:v1.31.1-focal)--typesthat's the name you will later use in your Tests as the test type (for example,executor-playwright/test)--command(in this case/bin/sh -c)--args(arguments - in this casenpm install; npx playwright test)
So, the final command may look like this:
testkube create executor --name container-executor-playwright --executor-type container --image mcr.microsoft.com/playwright:v1.31.1-focal --types executor-playwright/test --command "/bin/sh" --command "-c" --args "npm install; npx playwright test"
Executor CRD:
apiVersion: executor.testkube.io/v1
kind: Executor
metadata:
  name: container-executor-playwright-v1.31.1
  namespace: testkube
spec:
  image: mcr.microsoft.com/playwright:v1.31.1-focal
  command: ["/bin/sh", "-c"]
  args:
  - "npm install; npx --yes playwright@1.31.1 test"
  executor_type: container
  types:
  - container-executor-playwright-v1.31.1/test
Test CRD:
apiVersion: tests.testkube.io/v3
kind: Test
metadata:
  name: container-executor-playwright-smoke
  namespace: testkube
  labels:
    core-tests: executors
spec:
  type: container-executor-playwright-v1.31.1/test
  content:
    type: git-dir
    repository:
      type: git
      uri: https://github.com/kubeshop/testkube
      branch: main
      path: test/playwright/playwright-project
      workingDir: test/playwright/playwright-project
Input Data
You can provide input data via string, files, and Git repositories via the Testkube Dashboard. The data is downloaded into /data before the test is run using the Kubernetes Init container. When using the string type, the content is put into /data/test-content file. For example:
apiVersion: tests.testkube.io/v3
kind: Test
metadata:
  name: custom-container
  namespace: testkube
spec:
  content:
    data: |-
      {
        "project": "testkube",
        "is": "awesome"
      }
    type: string
  type: custom-container/test
Puts data into /data/test-content file:
cat /data/test-content
{
  "project": "testkube",
  "is": "awesome"
}
When using Git or Git directory sources, the content is placed inside /data/repo directory. For example:
apiVersion: tests.testkube.io/v3
kind: Test
metadata:
  name: custom-container
  namespace: testkube
spec:
  content:
    repository:
      branch: main
      type: git
      uri: https://github.com/kubeshop/testkube-executor-init
    type: git
Downloads into the /data/repo directory.
$ ls /data/repO
CODE_OF_CONDUCT.md  CONTRIBUTING.md  LICENSE  Makefile  README.md  build  cmd  go.mod  go.sum  pkg